使用kubeadm安装k8s集群的完整步骤(k8sv15.1)
一、創建虛擬機
首先使用vmware15 pro創建了4臺centos7虛擬機,其中,3臺用來組建k8s集群,1臺為master節點,2臺為node節點, 剩下的一臺用來安裝harbor配置私有倉庫(可選)。最大磁盤空間盡量大一點,我這里選擇的是80G,虛擬磁盤文件存儲為單個文件可以提升磁盤讀寫性能,一般不會有遷移的 情況。 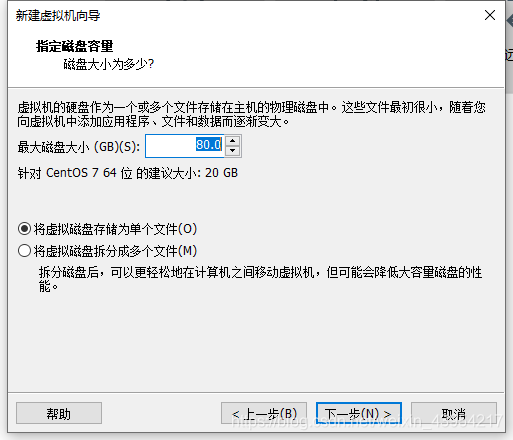虛擬機的網絡設置要特別注意,一定要保證各個虛擬機之間能相互訪問,且虛擬機能訪問外網,我使用的虛擬機網絡設置為NAT模式,相關配置如下圖,注意虛擬網關與虛擬網卡的IP地址不能相同,之前我誤將這兩個地址搞混了,全部設置為了192.168.238.1,導致虛擬機一直無法ping通百度,報錯為域名無法解析。后將網關設置為192.168.238.2,虛擬網卡設置為192.168.238.1,網絡正常。二、虛擬機環境準備
官網關于安裝的必備環境說明,至少2G內存和2CPU,節點間全網絡互聯,每個節點都有單獨的主機名和mac地址,開放對應端口,關閉swap分區。
1、修改虛擬機網卡配置文件
為了之后操作方便,先通過修改網卡配置文件,將虛擬機的ip地址設為靜態ip。步驟如下: vi /etc/sysconfig/network-scripts/ifcfg-ens33 #ens33為使用的網卡名,默認為ens33,可根據實際情況修改BOOTPROTO=static #改為static靜態ip,默認為dhcp NAME=ens33 DEVICE=ens33 ONBOOT=yes #yes表示開機自動聯網 IPADDR=192.168.238.128 GATEWAY=192.168.238.2 DNS1=8.8.8.8 DNS2=192.168.238.2 #網關ip NETMASK=255.255.255.0修改完成后重啟網絡配置使修改生效
systemctl restart network其他虛擬機同樣進行以上操作,完成后通過ping另外三臺虛擬機的靜態ip以及www.baidu.com判斷內網和外網是否正常。
2、修改主機名
hostnamectl set-hostname xxx #我這里設置的主機名分別是 k8s-node01 k8s-node02 master harbor修改后通過hostnamectl status查看主機名是否修改成功
3、修改/etc/hosts文件
修改hosts文件,來讓各虛擬機間通過主機名能相互訪問。
vi /etc/hosts #添加到文件末尾192.168.238.128 k8s-node01 192.168.238.129 k8s-node02 192.168.238.130 k8s-node03 192.168.238.131 k8s-master修改了一臺虛擬機上的該文件后,可在該虛擬機上通過scp命令直接將該文件拷貝到其他各虛擬機。
scp /etc/hosts root@k8s-node02:/etc/hosts scp /etc/hosts root@k8s-node03:/etc/hosts4、安裝依賴包
yum install -y conntrack ntpdate ntp ipvsadm ipset jq iptables curl sysstat libseccomp wgetvimnet-tools git5、設置防火墻為iptables并設置空規則
//關閉centos7默認的firewalld防火墻并取消自啟 systemctl stop firewalld && systemctl disable firewalld//安裝Iptables管理工具&&啟動Iptables&&設為Iptables開機自啟&&清空Iptables規則&&保存Iptables默認規則yum -y install iptables-services && systemctl start iptables && systemctl enable iptables&& iptables -F && service iptables save6、關閉selinux
swapoff -a && sed -i '/ swap / s/^\(.*\)$/#\1/g' /etc/fstab //關閉swap分區,永久關閉虛擬內存。K8s初始化init時,會檢測swap分區有沒有關閉,如果虛擬內存開啟,容器pod就可能會放置在虛擬內存中運行,會大大降低運行效率setenforce 0 && sed -i 's/^SELINUX=.*/SELINUX=disabled/' /etc/selinux/config7、調整內核參數,對于k8s
cat > kubernetes.conf <<EOFnet.bridge.bridge-nf-call-iptables=1net.bridge.bridge-nf-call-ip6tables=1net.ipv4.ip_forward=1net.ipv4.tcp_tw_recycle=0vm.swappiness=0 # 禁止使用 swap 空間,只有當系統 OOM 時才允許使用它vm.overcommit_memory=1 # 不檢查物理內存是否夠用vm.panic_on_oom=0 # 開啟 OOMfs.inotify.max_user_instances=8192fs.inotify.max_user_watches=1048576fs.file-max=52706963fs.nr_open=52706963net.ipv6.conf.all.disable_ipv6=1net.netfilter.nf_conntrack_max=2310720 EOF #其中必備參數net.bridge.bridge-nf-call-iptables=1net.bridge.bridge-nf-call-ip6tables=1 #開啟網橋模式net.ipv6.conf.all.disable_ipv6=1 #關閉ipv6的協議#其余為優化參數,可不設置cp kubernetes.conf /etc/sysctl.d/kubernetes.conf #拷貝,開機能調用該配置文件sysctl -p /etc/sysctl.d/kubernetes.conf #手動刷新,使配置立刻生效8、調整系統時區
#設置系統時區為中國/上海timedatectl set-timezone Asia/Shanghai#將當前的 UTC 時間寫入硬件時鐘timedatectl set-local-rtc 0# 重啟依賴于系統時間的服務systemctl restart rsyslog systemctl restart crond9、關閉不需要的郵件服務
systemctl stop postfix && systemctl disable postfix10、設置 rsyslogd 和 systemd journald
centos7默認有兩個日志系統rsyslogd 和systemd journald同時在工作,修改journald為默認方案。(即移除rsyslogd )
mkdir /var/log/journal # 持久化保存日志的目錄mkdir /etc/systemd/journald.conf.dcat > /etc/systemd/journald.conf.d/99-prophet.conf <<EOF[Journal]#持久化保存到磁盤Storage=persistent# 壓縮歷史日志Compress=yesSyncIntervalSec=5mRateLimitInterval=30sRateLimitBurst=1000# 最大占用空間10GSystemMaxUse=10G# 單日志文件最大200MSystemMaxFileSize=200M# 日志保存時間 2 周MaxRetentionSec=2week# 不將日志轉發到 syslogForwardToSyslog=noEOF#重啟journald配置systemctl restart systemd-journald11、升級內核為4.4版本
centos7默認的3.1版本內核存在一些bug,可能會導致docker和k8s運行不穩定。
rpm -Uvh http://www.elrepo.org/elrepo-release-7.0-3.el7.elrepo.noarch.rpm yum --enablerepo=elrepo-kernel install -y kernel-lt grub2-set-default "CentOS Linux (4.4.182-1.el7.elrepo.x86_64) 7 (Core)"可通過cat /boot/grub2/grub.cfg |grep menuentry查看當前系統所有可用內核,uname -r可查看當前系統使用的內核版本。
使用命令grub2-set-default 'CentOS Linux (4.4.203-1.el7.elrepo.x86_64) 7 (Core)'設置默認啟動內核為4.4版本,然后重啟后再使用uname -r查看修改是否生效。
以上操作均要為所有k8s集群主機設置!
三、k8s部署安裝
1、kube-proxy開啟ipvs的前置條件(改為lvs調度模式,可增加訪問效率)
#1、加載netfilter模塊modprobe br_netfilter #2、添加配置文件cat > /etc/sysconfig/modules/ipvs.modules <<EOF#!/bin/bashmodprobe -- ip_vsmodprobe -- ip_vs_rrmodprobe -- ip_vs_wrrmodprobe -- ip_vs_shmodprobe -- nf_conntrack_ipv4EOF#3、賦予權限并引導chmod 755 /etc/sysconfig/modules/ipvs.modules && bash /etc/sysconfig/modules/ipvs.modules &&lsmod | grep -e ip_vs -e nf_conntrack_ipv42、安裝docker容器
#1、安裝docker依賴yum install -y yum-utils device-mapper-persistent-data lvm2#2、導入阿里云的docker-ce倉庫yum-config-manager \--add-repo \http://mirrors.aliyun.com/docker-ce/linux/centos/docker-ce.repo#3、更新系統安裝docker-ceyum update -y && yum install -y docker-ce#4、docker安裝完成后內核版本可能會變為3.0,檢測版本若不是4.4內核,再參照上節設置默認內核版本,reboot查看 uname -r #5、啟動systemctl start docker#6、開機自啟systemctl enable docker#7、配置deamon,設置默認的cgroup組為systemd,默認centos有兩個cgroup組,一個是cgroupfs,一個是systemd管理的cgroup,且存儲的日志文件改為json格式cat > /etc/docker/daemon.json <<EOF{"exec-opts": ["native.cgroupdriver=systemd"],"log-driver": "json-file","log-opts": {"max-size": "100m"}}EOF#8、創建目錄存放docker配置文件mkdir -p /etc/systemd/system/docker.service.d #9、重啟docker并設置開機自啟systemctl daemon-reload && systemctl restart docker && systemctl enable docker3、安裝kubeadm
#1、導入阿里云的YUM倉庫cat <<EOF > /etc/yum.repos.d/kubernetes.repo[kubernetes]name=Kubernetesbaseurl=http://mirrors.aliyun.com/kubernetes/yum/repos/kubernetes-el7-x86_64enabled=1gpgcheck=0repo_gpgcheck=0gpgkey=http://mirrors.aliyun.com/kubernetes/yum/doc/yum-key.gpghttp://mirrors.aliyun.com/kubernetes/yum/doc/rpm-package-key.gpgEOF#2、在每個節點安裝kubeadm(初始化工具)、kubectl(命令行管理工具)、kubelet(與docker的cri交互創建容器)yum -y install kubeadm-1.15.1 kubectl-1.15.1 kubelet-1.15.1 # 3、k8s開機自啟.kubelet需要與容器接口進行交互啟動容器,而k8s通過Kubeadm安裝出來以后都是以pod方式存在,也就是底層以容器的方式運行,所以一定要開機自啟,否則重啟后可能k8s未啟動systemctl enable kubelet.service4、初始化主節點
kubeadm在初始化k8s集群時,會從gce谷歌云服務器中pull相關的鏡像,這步需要能夠科學上網,如果不能的話,可以用別人已經下載打包好的鏡像來進行初始化。步驟如下:
1、通過winscp之類的工具拷貝相關鏡像文件到/usr/local下,并進行加載
cd /usr/local/ll #查看鏡像文件是否拷貝成功#拷貝到其它虛擬機scp kubeadm-basic.images.tar.gz root@k8s-node02:/usr/local/kubeadm-basic.images.tar.gz #解壓tar -zxvf kubeadm-basic.images.tar.gz cd kubeadm-basic.imagesll #查看所有相關的組件鏡像文件,并進行一一加載docker load -i apiserver.tar docker load -i coredns.tar docker load -i etcd.tar docker load -i kubec-con-man.tar docker load -i pause.tar docker load -i proxy.tar docker load -i scheduler.tar也可寫一個腳本進行自動加載
vim loadimages.sh #!/bin/bash #先將所有鏡像組件名加入到txt文件中,再通過一個循環進行批量加載 ls /usr/local/kubeadm-basic.images > /usr/local/image-list.txt cd /usr/local/kubeadm-basic.images for i in $( cat /usr/local/image-list.txt ) dodocker load -i $i done rm -rf /usr/local/image-list.txt #賦予可執行權限 chmod a+x loadimages.sh ./loadimages.sh2、初始化節點
#顯示init默認的初始化文件,并打印出來到kubeadm-config.yaml文件中 kubeadm config print init-defaults > kubeadm-config.yaml此時,kubeadm-config.yaml中保存的即為kubeadm的初始化模板,然后修改該模板文件
1、修改ip為主節點的ip
2、修改k8s版本號與安裝的版本一致
3、增加pod網段設置(以上為flannle網絡插件初始默認的網絡區間)
4、將默認的調度方式改為ipvs
---apiVersion: kubeproxy.config.k8s.io/v1alpha1 kind: KubeProxyConfiguration featureGates:SupportIPVSProxyMode: true #兩個空格,與上面縮進格式對齊 mode: ipvs3、指定從那個yaml文件進行初始化安裝,自動頒發證書,并將所有信息寫入到kubeadm-init.log
kubeadm init --config=kubeadm-config.yaml --experimental-upload-certs | tee kubeadm-init.log
4、查看kubeadm-init.log文件
[root@k8s-master core]# vim kubeadm-init.log [init] Using Kubernetes version: v1.15.1 [preflight] Running pre-flight checks [preflight] Pulling images required for setting up a Kubernetes cluster [preflight] This might take a minute or two, depending on the speed of your internet connection [preflight] You can also perform this action in beforehand using 'kubeadm config images pull' [kubelet-start] Writing kubelet environment file with flags to file "/var/lib/kubelet/kubeadm-flags.env" [kubelet-start] Writing kubelet configuration to file "/var/lib/kubelet/config.yaml" [kubelet-start] Activating the kubelet service [certs] Using certificateDir folder "/etc/kubernetes/pki" [certs] Generating "front-proxy-ca" certificate and key [certs] Generating "front-proxy-client" certificate and key [certs] Generating "etcd/ca" certificate and key [certs] Generating "etcd/peer" certificate and key [certs] etcd/peer serving cert is signed for DNS names [k8s-node01 localhost] and IPs [192.168.238.131 127.0.0.1 ::1] [certs] Generating "etcd/healthcheck-client" certificate and key [certs] Generating "apiserver-etcd-client" certificate and key [certs] Generating "etcd/server" certificate and key [certs] etcd/server serving cert is signed for DNS names [k8s-node01 localhost] and IPs [192.168.238.131 127.0.0.1 ::1] [certs] Generating "ca" certificate and key [certs] Generating "apiserver" certificate and key [certs] apiserver serving cert is signed for DNS names [k8s-node01 kubernetes kubernetes.default kubernetes.default.svc kubernetes.default.svc.cluster.local] and IPs [10.96.0.1 192.168.238.131] [certs] Generating "apiserver-kubelet-client" certificate and key [certs] Generating "sa" key and public key [kubeconfig] Using kubeconfig folder "/etc/kubernetes" [kubeconfig] Writing "admin.conf" kubeconfig file [kubeconfig] Writing "kubelet.conf" kubeconfig file [kubeconfig] Writing "controller-manager.conf" kubeconfig file [kubeconfig] Writing "scheduler.conf" kubeconfig file [control-plane] Using manifest folder "/etc/kubernetes/manifests" [control-plane] Creating static Pod manifest for "kube-apiserver" [control-plane] Creating static Pod manifest for "kube-controller-manager" [control-plane] Creating static Pod manifest for "kube-scheduler" [etcd] Creating static Pod manifest for local etcd in "/etc/kubernetes/manifests" [wait-control-plane] Waiting for the kubelet to boot up the control plane as static Pods from directory "/etc/kubernetes/manifests". This can take up to 4m0s [apiclient] All control plane components are healthy after 20.502158 seconds [upload-config] Storing the configuration used in ConfigMap "kubeadm-config" in the "kube-system" Namespace [kubelet] Creating a ConfigMap "kubelet-config-1.15" in namespace kube-system with the configuration for the kubelets in the cluster [upload-certs] Storing the certificates in Secret "kubeadm-certs" in the "kube-system" Namespace [upload-certs] Using certificate key: 2ae558262cb76a660809b5c2ac130d5b37f37af6d0405b88773400e21dd9744e [mark-control-plane] Marking the node k8s-node01 as control-plane by adding the label "node-role.kubernetes.io/master=''" [mark-control-plane] Marking the node k8s-node01 as control-plane by adding the taints [node-role.kubernetes.io/master:NoSchedule] [bootstrap-token] Using token: abcdef.0123456789abcdef [bootstrap-token] Configuring bootstrap tokens, cluster-info ConfigMap, RBAC Roles [bootstrap-token] configured RBAC rules to allow Node Bootstrap tokens to post CSRs in order for nodes to get long term certificate credentials [bootstrap-token] configured RBAC rules to allow the csrapprover controller automatically approve CSRs from a Node Bootstrap Token [bootstrap-token] configured RBAC rules to allow certificate rotation for all node client certificates in the cluster [bootstrap-token] Creating the "cluster-info" ConfigMap in the "kube-public" namespace [addons] Applied essential addon: CoreDNS [addons] Applied essential addon: kube-proxyYour Kubernetes control-plane has initialized successfully!To start using your cluster, you need to run the following as a regular user:mkdir -p $HOME/.kubesudo cp -i /etc/kubernetes/admin.conf $HOME/.kube/configsudo chown $(id -u):$(id -g) $HOME/.kube/configYou should now deploy a pod network to the cluster. Run "kubectl apply -f [podnetwork].yaml" with one of the options listed at:https://kubernetes.io/docs/concepts/cluster-administration/addons/Then you can join any number of worker nodes by running the following on each as root:kubeadm join 192.168.238.131:6443 --token abcdef.0123456789abcdef \--discovery-token-ca-cert-hash sha256:cac283657a08d4352a2b7ded578c667e4949997e70f22d2453e1e99aa45950de根據日志中的提示執行以下代碼
mkdir -p $HOME/.kubesudo cp -i /etc/kubernetes/admin.conf $HOME/.kube/configsudo chown $(id -u):$(id -g) $HOME/.kube/config之后就可通過kubectl get node 查看節點狀況,由于網絡還未配置完成,此時master主節點還處于NotReady狀態。
5、部署網絡
cd /usr/local mkdir plugin cd plugin/ ll mkdir flannel cd flannel/ wget https://raw.githubusercontent.com/coreos/flannel/master/Documentation/kube-flannel.yml yum search wget yum install wget.x86_64 wget https://raw.githubusercontent.com/coreos/flannel/master/Documentation/kube-flannel.yml kubectl create -f kube-flannel.yml #自動創建flannel集成到k8s的yaml配置文件 kubectl get pod -n kube-systemkubectl get pod -n kube-system -w //監視kubectl get pod -n kube-system -o wide // 詳細信息flannel部署完成后,再kubectl get nodes查看節點狀態,發現主節點已處于running狀態。
四、配置私有倉庫Harbor
一、Harbor 安裝
安裝:Harbor 官方地址:官方地址:https://github.com/vmware/harbor/releases
1、解壓軟件包
tar xvf harbor-offline-installer-<version>.tgz https://github.com/vmware/harbor/releases/download/v1.2.0/harbor-offline-installer-v1.2.0.tgz2、修改daemon文件,增加證書信任配置
vim /etc/docker/daemon.json{"exec-opts": ["native.cgroupdriver=systemd"],"log-driver": "json-file","log-opts": {"max-size": "100m"}, "insecure-registries": ["https://hub.atguigu.com"] } #重啟docker,使配置生效,其它節點也需該操作 systemctl restart docker3、安裝docker-compose
sudo curl -L "https://github.com/docker/compose/releases/download/1.25.0/docker-compose-$(uname -s)-$(uname -m)" -o /usr/local/bin/docker-compose sudo chmod +x /usr/local/bin/docker-compose #查看是否安裝成功及安裝版本 docker-compose --version4、配置harbor.cfga
必選參數
hostname:目標的主機名或者完全限定域名:目標的主機名或者完全限定域名 ui_url_protocol::http或或https。默認為。默認為http db_password:用于db_auth的的MySQL數據庫的根密碼。更改此密碼進行任何生產用途數據庫的根密碼。更改此密碼進行任何生產用途 max_job_workers:(默認值為:(默認值為3)作業服務中的復制工作人員的最大數量。對于每個映像復制作業,)作業服務中的復制工作人員的最大數量。對于每個映像復制作業,工作人員將存儲庫的所有標簽同步到遠程目標。增加此數字允許系統中更多的并發復制作業。但是,由于每個工工作人員將存儲庫的所有標簽同步到遠程目標。增加此數字允許系統中更多的并發復制作業。但是,由于每個工作人員都會消耗一定數量的網絡作人員都會消耗一定數量的網絡/ CPU / IO資源,請根據主機的硬件資源,仔細選擇該屬性的值資源,請根據主機的硬件資源,仔細選擇該屬性的值 customize_crt:(:(on或或off。默認為。默認為on)當此屬性打開時,)當此屬性打開時,prepare腳本將為注冊表的令牌的生成腳本將為注冊表的令牌的生成/驗證創驗證創建私鑰和根證書建私鑰和根證書 ssl_cert::SSL證書的路徑,僅當協議設置為證書的路徑,僅當協議設置為https時才應用時才應用 ssl_cert_key:SSL密鑰的路徑,僅當協議設置為密鑰的路徑,僅當協議設置為https時才應用時才應用 secretkey_path:用于在復制策略中加密或解密遠程注冊表的密碼的密鑰路徑:用于在復制策略中加密或解密遠程注冊表的密碼的密鑰路徑1、修改hostname
2、修改ui_protocol,將http改為https
3、根據證書路徑創建對應文件夾,并進入該目錄
在windows物理機上也要修改hosts文件
C:\Windows\System32\drivers\etc hosts文件
用管理員權限向文件添加 192.168.238.131 hub.atguigu.com
windows中就可以用瀏覽器訪問 hub.atguigu.com
默認賬密:admin
Harbor12345
install執行成功后,可以使用docker ps -a查看harbor相關鏡像是否安裝成功。
二、測試k8s集群是否可以使用到harbor
在一個工作節點上測試docker能否訪問harbor
vim /etc/docker/daemon.json systemctl restart docker docker login https://hub.atguigu.com docker images docker pull llj512346/test_tomcat docker tag llj512346/test_tomcat:latest hub.atguigu.com/library/myTomcat:v1 docker tag llj512346/test_tomcat:latest hub.atguigu.com/library/mytomcat:v1 docker push hub.atguigu.com/library/mytomcat:v1 docker images docker rmi -f hub.atguigu.com/library/mytomcat:v1 docker rmi -f llj512346/test_tomcat docker rmi -f hub.atguigu.com/library/mytomcat docker rmi -f hub.atguigu.com/library/mytomcat:v1 docker images docker ps -a docker ps -a |grep tomcat以上操作將公共倉庫中的鏡像llj512346/test_tomcat下載并重新打包成了myTomcat:v1到了harbor私有倉庫中。新鏡像通過hub.atguigu.com/library/mytomcat:v1訪問。
然后再在master節點上,執行以下代碼測試
然后即可通過http://192.168.238.131:32265/訪問到tomcat頁面,其中32265為get svc中service暴露的外部端口。
總結
以上是生活随笔為你收集整理的使用kubeadm安装k8s集群的完整步骤(k8sv15.1)的全部內容,希望文章能夠幫你解決所遇到的問題。

- 上一篇: 华三的AC对接绿洲平台的无线认证配置
- 下一篇: Linux 绑定USB设备端口