实现用户操作指引功能
生活随笔
收集整理的這篇文章主要介紹了
实现用户操作指引功能
小編覺得挺不錯的,現在分享給大家,幫大家做個參考.
主要是通過定位找到需要指引的目標元素,然后再在蒙版上畫一個div,設置為白色,定位到目標元素位置。思路大概就是這樣。 圖一:  圖二: 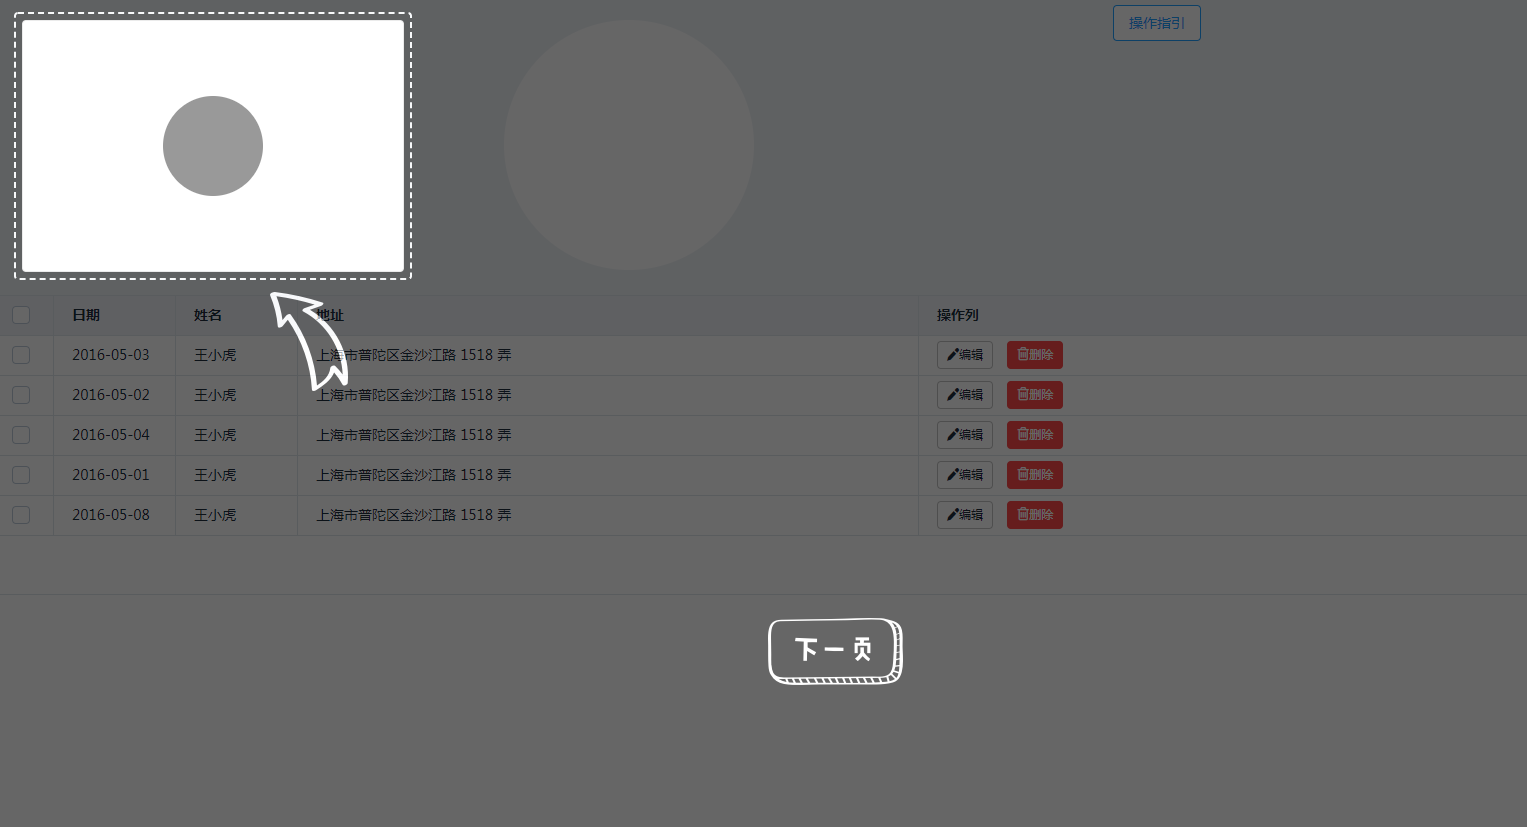 圖三:  代碼如下: ``` html rel="stylesheet" href="https://unpkg.com/element-ui@1.4/lib/theme-default/index.css">
* { list-style: none; text-decoration: none; padding: 0; margin: 0 }
.wrapper { width: 100%; height: 300px; background: #eef2f6 }
.wrapper .arc { width: 250px; height: 250px; background: #fff; position: relative; margin-left: 100px; float: left }
.wrapper .content { width: 380px; height: 250px; float: left; background: #fff; border: 1px solid #ccc; position: relative }
.wrapper .content div { position: absolute; left: 50%; top: 50%; width: 100px; height: 100px; background: #000 }
.border_content { width: 100px; height: 50px; border: 3px dashed #000 }
.wrapper_mask { width: 100%; height: 100%; position: fixed; top: 0; left: 0; background: #000; opacity: 0.6; z-index: 999 }
.wrapper_mask .mask_content { width: 100%; height: 100%; background: #fff }
.mask_content_border { position: absolute; border: 2px dashed #fff; z-index: 9999; padding: 6px }
.cloneBtn { position: relative; right: -384px; top: 10px }
.mask1 .mask_content_border .arrow1 { position: relative; top: 20px; left: 248px }
.mask_button { position: absolute; bottom: 20%; left: 50%; cursor: pointer }
.html-body-overflow { }
``` 實現效果如圖二、圖三所示。
更多專業前端知識,請上 【猿2048】www.mk2048.com
更多專業前端知識,請上 【猿2048】www.mk2048.com
總結
以上是生活随笔為你收集整理的实现用户操作指引功能的全部內容,希望文章能夠幫你解決所遇到的問題。

- 上一篇: jq实现前端文件上传
- 下一篇: Table Dragger - 简单的